Archives

All posts for the month November, 2013

Reflection 11: Making Our Own Poster

Published November 25, 2013 by norzahidah

Assalamualaikum and hi everybody. Today is such a good day for me.

I am totally excited as today we are going to learn on how to make a poster! We also have to make a poster for our video. We will present our poster on Edutechnovation Day that will be held on week 14. At that day, we have to present our slide, video and poster altogether. It is a big day for this subject.

The poster that we makes must suit with our video. It must portrays our ideas as we are going to do about ‘ the appreciation of His favour’ which is mother. So, we have to find something that show how grateful we are to have a mother. We also may add some effect on the poster to make it more real.

So, here are few steps on how to create a poster:

1) Set your canvas

FILE > NEW

PRESET > INTERNATIONAL PAPER

SIZE > A3

RESOLUTION > 100 – 150

Then click OK.

2) Import a picture as the background

FILE > OPEN > CHOOSE A PICTURE FROM THE FILE IN YOUR COMPUTER

3) To have a landscape image

IMAGE > IMAGE ROTATION > 90′ CLOCKWISE

4) To set up a new canvas

WINDOW > ARRANGE > FLOAT ALL IN WINDOW ( do it two times)

5) To drag the picture from the 1st canvas

Click on the MOVE TOOL icon then drag the picture

6)To adjust the size of the picture

Click the box SHOW TRANSFORM CONTROL.

Press the left click with the SHIFT button on your keypad simultaneously to adjust the size of the picture without changing the picture’s proportion.

7) To colour the background

WINDOW > LAYERS > BACKGROUND > GRADIENT TOOL > BUCKET TOOL > Choose the colour that you prefer > Move the cursor to the background then click it

8) To give effects to the picture

IMAGE > ADJUSTMENT > PHOTO FILTER

9) To add text to the picture

 SELECTION TOOL > TEXT

Click the cursor on your image and then type your text

10) To change the colour of your text

Right click on the TEXT’S LAYER > BLENDING OPTIONS

In the future, I think I will use poster in the classroom as I am a teacher to be. By using poster, it will attract students become more interested with learning. Students nowadays are more advance in technology and they want something new in learning.

That all from me. Thanks for reading my post.. 🙂
Reflection 10: Presentation Video

Published November 18, 2013 by norzahidah

Assalamualaikum and good day everybody..

Today we are going to present the progress in our video. We only manage shoot for the first three scene for this time. Another scene will be shoot next time.  This presentation will be evaluate as all of us will be given marks. Actually it is midterm examination. It is really suprising as we have never sit for midterm before this. Moreover we have been told about it on last minute, so we do not have much time to make our preparation.

We have to sit together and discuss about the presentation. This is the guideline given for our content of slides:

  • prepare a medium of presentation by using powerpoint
  • the content includes the title, group members, title of the video, the objectives of making the video
  • presentation of the complete parts of the video and the edited ones
  • presentation of the scenes (complete or incomplete)
  • your expectation towards the video

We divide slide equally as all of us must speak in the front. I think there a lot of things that can be improved from our video as we get some feedback from Dr. Rosseni and Mr Helmi.

I think that all for today. Till we meet again next time. Assalamualaikum…. 🙂

Reflection 9: Adobe Photoshop CS4

Published November 11, 2013 by norzahidah

 Assalamualaikum w.b.t and hello all..

This time Mr. Helmi taught us on how to use Adobe Photoshop CS4. It actually my first time using this software because I am not really exposed in editing photos.

adobe_photoshop_cs4_icon_2

Adobe Photoshop CS4 or CS3 and many more can be used for edit our pictures so that we can add more effect to the picture. We have to upload a picture then we can start editing it. There are many effect and transition that we can apply into the picture.

I think that Mr Helmi taught us very fast because sometime I lost but after been given guidance by him, I can do it finally. I also asks help from my coursemates because some of them are already expert in using this software.

I think this software is very useful in our video project. We can use it to edit the picture, because we want to show different in present and past times.

Here is the picture that I have edited using this software.

dscn0793 hu

On the left is picture before edit and on the right side is edited version.

That all for this time. Thank you.. 🙂

Reflection 8 : Window Movie Maker ^_^

Published November 3, 2013 by norzahidah

Assalamualaikum w.b.t and good morning. We meet again this time.. Okay, for this week I feel more excited as I learns how to use Window Live Movie Maker. This software suite and offers the ability to create and edit video.

w

  It is very important for me to know how to use it as I will using it to make our video.Actually this is my second time using this software but I’m still not really familiar with this software. But I am willing to learn and I’ll explore more.

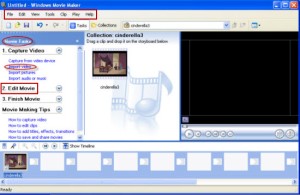
Mr. Helmi teach us how to import video and picture into this software. It just an easy step. Now let see this images to make it more clear..

import-video-to-wmm

Then, we explore the effects to make our video become more interesting. Many effect such as Zig Zag, Shatter and Fade. We  also adding some transition between two pictures, video clips, or titles in any combination on the storyboard/timeline. Effect can be used to add a special effects to our movie.

By using this software, we also can put audio that suitable with our video. We also can cut the original audio and replace it with other audio. In our video, we also add old film effect to show the differences in times.

So, here is some part of our video. Another scene that on progress.

http://www.youtube.com/watch?v=SQ0l-Owu-Gs&feature=youtu.be

That is all for today. Thank you very much for reading my post. 🙂